Showing posts with label BAKE. Show all posts

Monday, January 26, 2015

BAKE | BLUEBERRY CREAM SCONES

Some days you just don't feel like eating a muffin. I know it seems bizarre, but I'm on my fifth day of eating Costco Copycat Double Chocolate Muffins for breakfast - and, dare I say it, I'm over them (even though I was eating two a night the first coupe of days). Enter these blueberry cream scones - the perfect things to get you out of your muffin rut, especially a blueberry muffin rut. Joy's recipe calls for strawberries (which is wonderfully delicious), but I thought I'd switch it up and add blueberries - which totally satisfies that blueberry muffin craving but with more crispy surface area (#muffintopsforlife).

The process is a little messy, but it's well worth it. And in less that 15 minutes these creamy, sticky disks bake up in the yummiest scones.


Blueberry Cream Scones adapted from Joy the Baker
makes about 16 scones

  • 3 cups all-purpose flour
  • 1 TBS baking powder
  • 1 tsp salt
  • 1/3 cup granulated sugar
  • 1 tsp vanilla extract
  • 1 and 1/3 cup heavy cream plus more for brushing the top
  • 3/4 cup blueberries (I used frozen which gave my dough a purple swirl) 
  • turbinado sugar for topping


  1. Place a rack in the upper third of the oven and preheat to 425 degrees F.
  2. In a medium bowl, whisk together flour, baking powder, salt, and sugar. 
  3. In a liquid measuring cup mix together vanilla extract and 1 1/3 cups cream. Slowly add the cream mixture into the dry ingredients while stirring.  Add blueberries and mix gently.  Add 2 more tablespoons of cream if necessary to create a moist, but not sticky dough.
  4. Dump the dough onto a floured work surface.  Gently gather and push the dough into a dish into a 3/4 inch thickness.
  5. Use a biscuit cutter to cut 2-3 inch circles.  Brush each circle with heavy cream and sprinkle generously with turbinado sugar.
  6. Place 1-inch apart on a lined baking sheet and bake for 12 to 14 minutes or until golden brown and cooked through.
  7. Remove from the oven and serve warm.  


You don't have to wait for tea time to eat these scones. They are moist with just the right amount sweetness. Plus turbinado sugar topping adds the perfect crunch. Eat them plain or with a slab of butter! You'll be happy that you made these instead of another dozen blueberry muffins.

xoxo, allison

Friday, May 23, 2014

BAKE | TOASTED COCONUT CHOCOLATE CHIP SCONES

 This morning I woke up and needed to bake something. I scrolled through my Pinterest boards and came across this apple cake by Smitten Kitchen. And then I opened my fridge to find that I only had one apple. Sigh. For a moment I thought "hey, I could put on my new Nikes and walk to Target to get apples and exercise!" HAHA. Who was I kidding? I wasn't going to walk to Target. I convinced myself that Target might not even have the apples I wanted.

Then, I remembered these Toasted Coconut Chocolate Chip Scones I pinned last week. I'm totally into toasted coconut ever since my mom added some to the top of the cream cheese frosting carrot cake I made for Mother's Day. These come together super quickly. I used my hands to cut the butter into the dry ingredients, NBD, and then I used my new cookie scoop from Joyce instead of forming round disks with my hands - easy peasy. They are super moist and fluffy inside, not your typical scone. Next time I'm going to double the toasted coconut! (I told you, I'm totally into the toasted coconut.)

Recipe Adapted from The First Year Blog
Makes 10 scones

Ingredients
  • 1/4 cup sugar
  • 1 and 1/2 cups flour
  • 1 and 1/2 tsp baking powder
  • 1/4 tsp salt
  • 4 TBSP butter, cubed
  • 1/4 tsp coconut extract (or vanilla extract)
  • 1 egg
  • 6 TBSP heavy cream (I used 3 TBSP milk + 3 TBSP plain yogurt)
  • 1/4 -1/2 cup oven toasted coconut
  • 1/3 cup chocolate chips
  1. Preheat the oven to 400 degrees F.
  2. Toast the coconut in the preheating oven: Place shredded coconut on foiled lined baking sheet and bake for 1-2 minutes. Keep on eye on it because it can burn quickly.
  3. Combine the sugar, flour, baking powder and salt.
  4. Using your fingers, cut in the butter into a crumbly mixture.
  5. Mix the egg, heavy cream (or milk + yogurt), and coconut extract in a separate bowl, then add to the dry ingredients and combine.
  6. Add in the toasted coconut and chocolate chips, mix until combined.
  7. Use large cookie scooper to scoop large rounds on dough onto silpat lined baking sheet.
  8. Bake for 10-12 minutes or until the scones are slightly browned. Cool on wire rack.


xoxo, allison

Friday, April 25, 2014

BAKE | LIME BERRY CAKE


Ever since I made this carrot cake and I realized that I didn't have a bundt pan, I've really wanted to make a bundt cake. Bundt cakes caught my eyes on Pinterest and I dreamed about them in my sleep. I refused to make the recipes in regular cake pans and convinced myself I needed a bundt pan. And then one magical day my mom bought me one. A super cute, lime green bundt pan! And so I made the first bundt cake recipe I could find.

The important part of this cake is the lime. I was really excited to find one lime in my produce drawer but didn't realize how long it had probably been sitting in there until I was too far into the recipe. Lesson learned #1: use a fresh, new, juicy lime with bright skin. So that your lime zest will be fragrant and amazing and make your sugar lime-zesty-amazing which, in turn, will make your cake amazing. My cake was still moist and berryful but I couldn't taste the lime.

Lesson learned #2: Don't over grease and flour coat your bundt pan. My biggest fear is having my gorgeous cake get stuck. So I went a little too overboard with the cooking spray and flour, and my cake had a weird flour/cooking spray coating on the top of it. I disguised it with powdered sugar, but still, it was weird.

Sweet Berry Lime Cake adapted from Joy the Baker
makes 1 Bundt cake
  • 1 1/2 cups granulated sugar
  • 1 TBS fresh lime zest
  • 3 cups all-purpose flour
  • 1 TBS baking soda
  • 1 tsp salt
  • 1/2 tsp cinnamon (optional)
  • 3 large eggs
  • 1 cup unsalted butter, melted and cooled slightly
  • 1 cup plain yogurt (or buttermilk)
  • 1 TBS fresh lime juice
  • 1 and 1/2 cup frozen mixed berries or (3/4 cup fresh raspberries + 1/2 cup fresh blueberries)
  1. Grease and flour a Bundt pan.  Set aside.
  2. In a small bowl, combine granulated sugar and lime zest.  Using your fingers, or the back of a spoon, rub the zest into the sugar, releasing the essential oils.  The sugar will be lime scented.
  3. In a large bowl, combine lime sugar, flour, baking soda, salt, and cinnamon.  In a separate bowl, whisk together eggs, butter, buttermilk and lime juice.
  4. Add the wet ingredients all at once to the dry ingredients.  Stir until all of the dry ingredients are moistened and the mixture is thoroughly combined.  The batter will be fairly thick.  Add the berries and gently fold into batter. (I used frozen berries and pushed them into the batter as I spooned it into the bundt pan because the berry colors tend to bleed when you fold them in.)
  5. Spoon the batter into the prepared pan.  Bake at 350 degrees F for 45-50 minutes, or until a skewer inserted in the center of the cake comes out clean.  Allow to cool in the pan for 20 minutes then invert onto a wire rack to cool completely.  To serve, sprinkle with powdered sugar and serve with coffee.


I can't wait to make more bundt cakes in my pretty pan!

xoxo, allison

Tuesday, April 22, 2014

BAKE | MINI CINNAMON ROLLS

I took my favorite cinnamon roll recipe from Joy the Baker and made them mini! Okay, okay. I know what you're going to say. YOU BURNT THE CINNAMON ROLLS! Well, they may look burnt but they didn't taste burnt. And, to tell you the truth, I didn't take any pictures of this batch with the frosting on because they were gone so fast. So I made another twenty-four mini rolls for my Young Adult Ministry at church. At the end of the night I was left with two, and a snapped a picture of them the morning after.
Recipes adapted from my Joy the Baker Cookbook

Ingredients:
DOUGH
  • 1 (1/4 oz) package active dry yeast
  • 1/4 cup granulated sugar (+ 1/2 teaspoon for yeast)
  • 1/2 cup milk, room temperature (I used 2% because that's all we had)
  • 2 TBS packed brown sugar
  • 1 tsp vanilla extract
  • 1 egg + 1 egg yolk
  • 2 and 3/4 cups all-purpose flour (+ 3/4 cup for kneading)
  • 1/2 cup (1 stick) unsalted butter, softened
  • 3/4 teaspoon salt (optional)
FILLING
  • 1/2 cup granulated sugar
  • 1/2 cup packed light brown sugar
  • 1 TBS cinnamon
  • 3 TBS maple syrup
  • 1/2 cup finely chopped pecans (optional)
  • 1/4 cup (1/2 stick) butter, melted

To make the dough:
  1. In a large stand mixer bowl, combine yeast with 1/2 tsp granulated sugar. Add 1/4 cup warm water (warm to touch, ~115° F) to the yeast mixture. Stir to combine and let sit for 3-5 minutes until frothy and foamy. (If this does not happen, start over with new yeast.)
  2. To the  foamy yeast, add 1/4 cup granulated sugar, milk, brown sugar, vanilla, egg and egg yolk. Beat with wire whisk until well combined.
  3. Place the bowl onto the mixer with a dough hook. Add the 2 and 3/4 cups flour and salt to the wet ingredients and mix on medium until just combined. Then turn the mixer up to medium-high and knead dough for 4 minutes.
  4. Add the softened butter and knead for 6 more minutes. The dough will still be wet and sticky. Turn out the dough onto a floured surface and hand knead 1/2 cup of flour into the dough. The dough will still be slightly sticky. Place the dough into a bowl and cover it with plastic wrap and a kitchen towel. Leave it in a warm place to rise for 2 hours or until doubled in size.
  5. Now you can make the filling: combine sugars, and cinnamon. Then stir in maple syrup and set aside. (You can also now make the cream cheese frosting using the recipe below.)
  6. When the dough has doubled in size, dump it onto a floured surface and knead until it is no longer sticky adding about 3 TBS of flour. Knead the dough for 5 more minutes then place the kitchen towel over it, and let the dough rest on the counter for 5 minutes.
  7. Roll the dough into a 10 x 24 inch rectangle using a rolling pin lined with plastic wrap (or floured). 
  8. Brush the dough with the melted butter. Sprinkle all of the filling over the dough, spreading evenly but leaving a 1 inch border on one of the long sides for sealing. Roll the dough from the opposite long side into a tight cylinder so you have a 2 foot long roll
  9. Cut roll into 24 slices using a sharp knife. This is most easily done by marking the middle with the knife, then the middles of those halves (to mark fourths), then the middles of those fourths (to mark eighths),and then mark each eighth into thirds (2 x 2 x 2 x 3 = 24). Or you can just cut in 1 inch segments if your log is actually 24 inches long!
  10. Arrange the slices into a greased 9x13 inch baking pan. Cover with plastic wrap and leave to rest in a warm place for 2 hours. 
  11. Bake at 375° F until golden brown about 15-17 minutes. Remove from oven and smother with cream cheese frosting.

CREAM CHEESE FROSTING
  • 4 oz cream cheese, softened
  • 1/4 cup unsalted butter, softened
  • 1 cup powdered sugar
  • 1 tsp vanilla extract
  1. Beat cream cheese with electric mixer for 1 minute until smooth. Scrap down the sides of the bowl with a spatula and then add butter. Beat butter into cream cheese for 1 minute, until combined. On low speed, add powdered sugar and vanilla (I folded the powdered sugar in by hand to avoid the mess and then used my hand mixer to completely combine ingredients.)
  2. Store frosting in refrigerator in air tight container until ready to use!
Please bake these and share them!

xoxo, allison

Tuesday, April 15, 2014

BAKE | PEANUT BUTTER BLOSSOMS

As I mentioned yesterday, Allison and I helped David bake cookies for his Church bake sale. These are the peanut butter cookies we made topped with a Hershey Kiss! This one was my favorite, but I love peanut butter so I'm probably biased. 
All ready for the bake sale!

Peanut Butter Blossoms
Adapted from the Hershey's website
Makes 24 cookies

24 Hershey's Kisses Brand Milk Chocolate
1/2 cup shortening
3/4 cup peanut butter
1/3 cup granulated sugar
1 egg
2 tablespoons milk
1 teaspoon vanilla extract
1 1/2 cups all-purpose flour
1 teaspoon baking soda
1/2 teaspoon salt
Additional granulated sugar

  1. Heat oven to 375°F. Remove wrappers from chocolates. 
  2. Beat shortening and peanut butter in large bowl until well blended. Add 13/ cup granulated sugar and brown sugar; beat until fluffy. Add egg, milk and vanilla; beat well. Stir together flour, baking soda and salt; gradually beat into peanut butter mixture. 
  3. Shape dough into 1-inch balls (We made ours a little bigger). Roll in granulated sugar; place on ungreased cookie sheet. 
  4. Bake 8 to 10 minutes or until lightly browned. immediately press a chocolate into center of each cookie; cookie will crack around edges. Remove from cookie sheet to wire rack. Cool completely. 
xoxo, traci

Sunday, April 13, 2014

BAKE | MINI STRAWBERRY CREAM SCONES

This morning, I woke up with my thumb throbbing. I was super confused...did I smash it in a door frame yesterday? Did I drop something on it and forget I did? Probably. I'm clumsy and forgetful and often have bruised knees. But then my thumb started getting itchy - a bug bite, duh! and then I found a bug bite on my elbow and another on my hip. Let me tell you, a bug bite on your thumb is THE most annoying thing ever. But these mini strawberry cream scones will make you forgot all about the little annoying things going on in your life. 

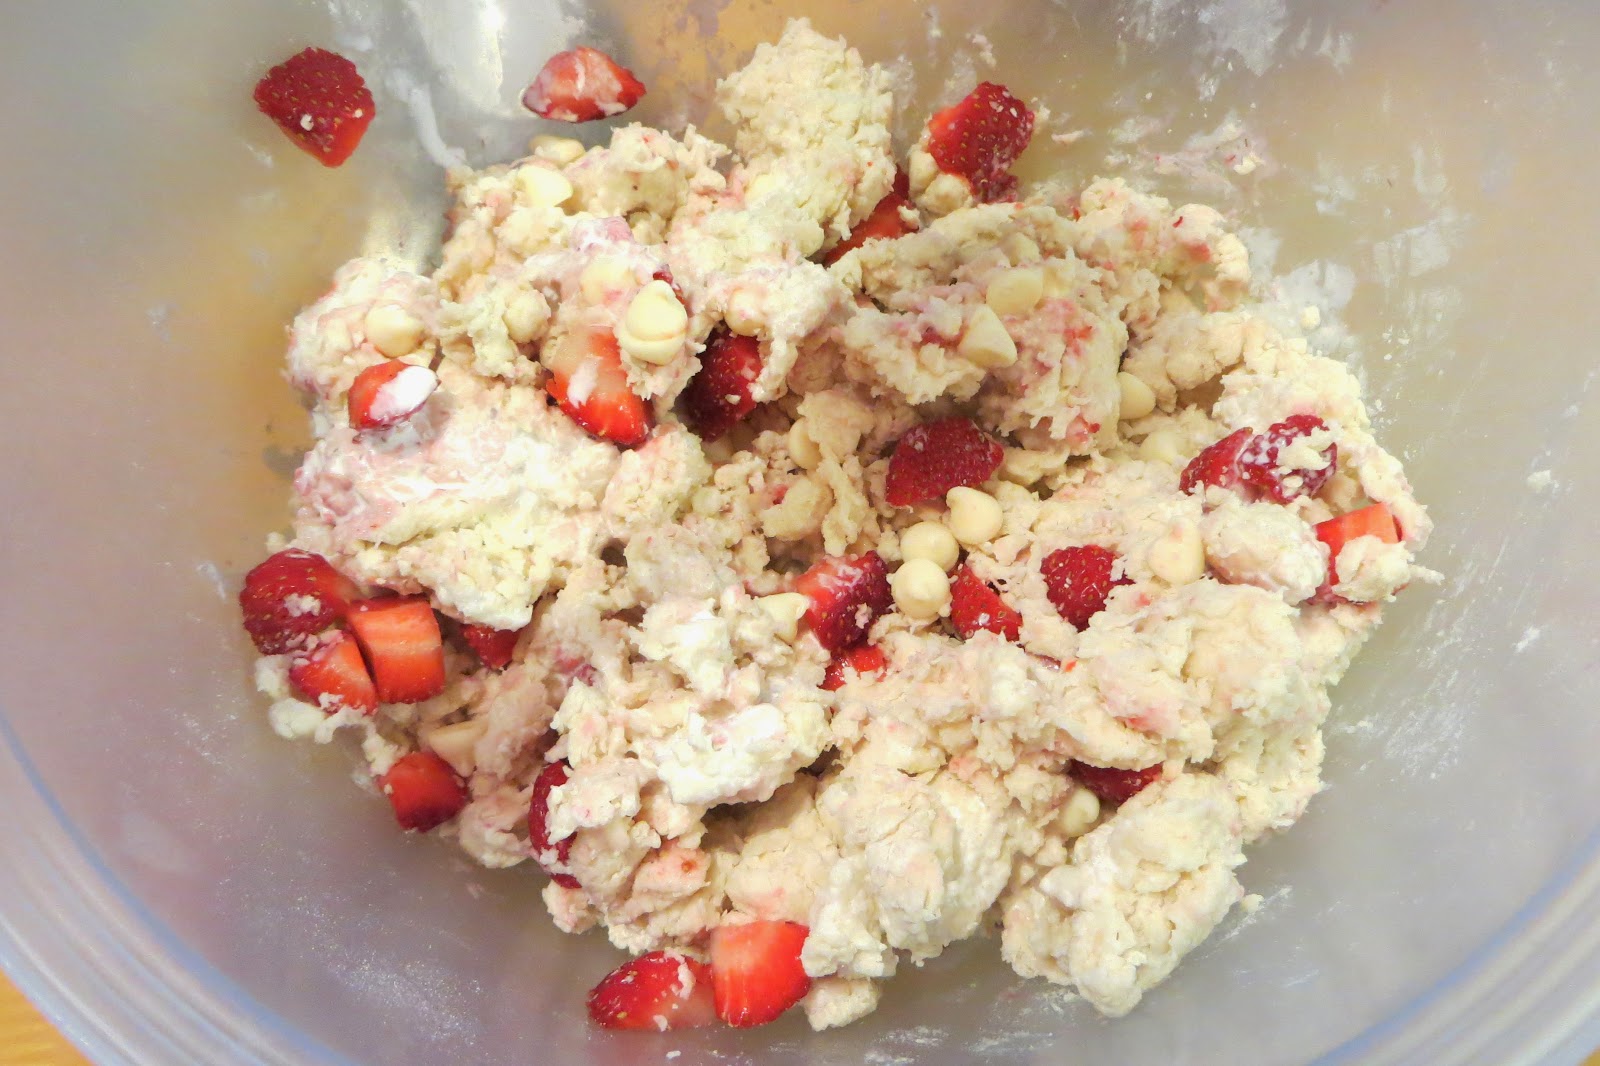
Mini things are better because they mean you can eat two or three instead of just one. I've never made strawberry scones before but since it's strawberry season, it seemed like the perfect time to try. Plus these are made with heavy cream instead of butter and milk which make them that much easier to make. Throw in some white chocolate, and these are perfection (I usually prefer dark chocolate or milk chocolate, but white chocolate is just what these scones need. And they blend right into the dough for a sweet surprise!) 
in go the juicy strawberries and white chocolate chips
Add a little heavy cream to help with the mixing
oops. I added a bit too much and ended up with super sticky dough but that's okay, just messy
used my 100ml glass beaker to punch out the mini scones
Tiny Strawberry Cream Scones
makes about 24 -27 small scones
adapted from Joy the Baker
  • 3 cups all-purpose flour
  • 1 TBS baking powder
  • 1 tsp salt
  • 1/3 cup granulated sugar
  • 1 tsp pure vanilla extract
  • 1 and 1/3 cups + 2 TBS heavy cream plus more for brushing the top
  • 1 cup coarsely chopped fresh strawberries
  • 1/3 cup white chocolate chips
  • turbinado sugar for topping

  1. Place a rack in the upper third of the oven and preheat oven to 425 degrees F.  Line a baking sheet with a Silpat or parchment paper and set aside.
  2. In a medium bowl, whisk together flour, backing powder, salt, and sugar.  Set aside.
  3. In a liquid measuring cup mix together vanilla extract and 1 1/3 cups cream. Drizzle the cream mixture into the dry ingredients tossing and stirring as you pour in the cream.  Add the strawberry chunks and white chocolate.  Toss/stir together (the strawberries may get mushed a little and that's okay).  Add 2 more tablespoons of cream if necessary to create a moist, cohesive, but not sticky dough.
  4. Dump the dough onto a lightly floured work surface.  Gently gather and knead the dough into a dish and press the disk out into a 3/4 inch thickness.
  5. Use a small biscuit cutter to cut circles from the dough disk (1 1/4 - 2 inch diameter is fine).  Sprinkle generously with turbinado sugar (if the dough isn't wet enough to hold the sugar you can press it down lightly with the back of a spoon or brush the tops with some heavy cream.)
  6. Place 1 inch apart on the prepared baking sheet and bake for 12 to 14 minutes or until golden brown and cooked through. Remove from the oven and serve warm.  

carotene the carrot eating a scone

xoxo, allison
Friday, April 11, 2014

BAKE | EASY KISSES CHOCOLATE CHIP COOKIES


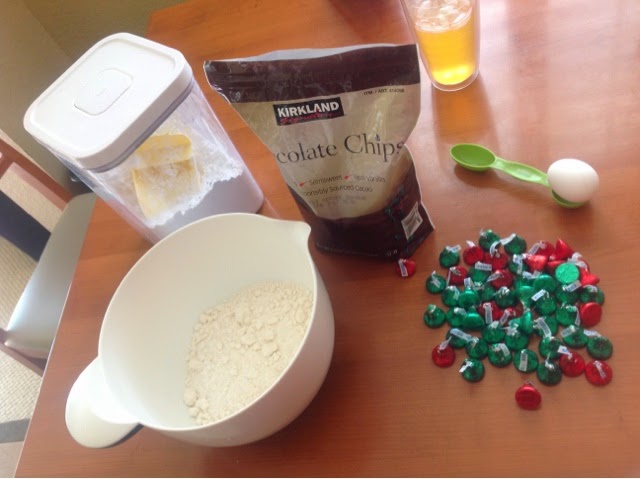
So I got a text from David the other day saying that he was having a bake sale at church and needed help baking cookies. Since I had a lot of extra Hershey Kisses that I got from the after Christmas sale (don't worry- they're not expired yet!), I told David to go look for a recipe online with Hershey Kisses. He found two recipes that looked really easy to make, so we decided to make both! Alley came over too and we were able to make them really quickly. We made the chocolate chip cookies first (the ones that look like little round balls at the top of the picture)... I'll post the peanut butter (the ones with the gigantic kiss in the middle) recipe tomorrow :) I was super excited to make these cookies because although they look like regular chocolate chip cookies, they actually have a Hershey Kiss inside!!! Don't you just love surprises?!


nap time for me while David did the mixing :)


KISSES Chocolate Chip Cookies
Adapted from the Hershey's website
Makes 24 cookies

  • 24 Hershey's Kisses Brand Milk Chocolates
  • 1 pouch Betty Crocker Sugar Cookie Mix
  • 2 tablespoons all-purpose flour
  • 1/3 cup butter or margarine, softened
  • 1 egg
  • 1-1/4 cups chocolate chips
  • 1 teaspoon shortening


  1. Heat oven to 350°F. Remove wrappers from chocolates. 
  2. Stir together cookie mix and flour; add butter and egg. Stir until dough forms. Set aside 1/4 cup chocolate chips. Stir remaining chips into dough. 
  3. Mold dough around each chocolate piece, covering completely. (The original recipe recommended using 1 tablespoon of dough, but I used around 2. My cookies turned out bigger so I was only able to make 24 instead of the the 52 that the original recipe said it would make) Shape into balls; place on ungreased cookie sheet
  4. Bake 9-11 minutes or until cookie is set. Cool slightly; remove from cookie sheet to wire rack. Cool completely.
  5. Optional chocolate drizzle- we decided that the cookie already had enough chocolate, so we decided not to do it. If you're a huge chocolate fan though, I'd recommend it :)
    • Place remaining 1/4 cup chips and shortening in heavy-duty resealable plastic food storage bag. microwave at medium for 30 seconds; stir. If necessary, microwave at medium an additional 10 seconds at a time, kneading after each heating, until chocolate is melted and mixture is smooth. Cut off corner of bag about 1/8 inch from point. Drizzle over cookies. 

xoxo, traci 

Tuesday, April 8, 2014

BAKE | BERRY COCONUT CHIA SEED BANANA BREAD


 When I decided to make double chocolate banana bread, I knew that I should probably balance it out with another, healthier banana bread recipe. This bread has so many add-ins that it could be a meal on its own. Breakfast perhaps? (it'll keep you full until lunchtime.) Raspberries, blackberries, chia seeds, and coconut are mixed into the banana bread batter and then topped with more coconut that gets toasted while the bread bakes. uhh..yum!
all the little chia seeds
layering in the berries so they don't bleed
more coconut on top to get toasty

Recipe Adapted From Ambitious Kitchen
Makes one 9x5 loaf

INGREDIENTS
  • 1 3/4 cup all purpose flour
  • 1 tsp baking powder
  • 3/4 tsp baking soda
  • 1/4 tsp salt
  • 3 ripe bananas. mashed (about 1 cup)
  • 1 TBS coconut oil, melted and cooled
  • 1/3 cup packed brown sugar
  • 2 tsp vanilla extract
  • 1 egg
  • 1/4 cup plain yogurt 
  • 2 TBS unsweetened soy milk (almond, coconut, or skim also work)
  • 1 and 1/2 cup mixed berries, frozen
  • 1/2 cup unsweetened coconut, plus 2-3 TBS for topping (sweetened is fine)
  • 2 TBS chia seeds

  1. Preheat oven to 350 degrees F. Grease 9x5 inch loaf pan with cooking spray or line with parchment paper.
  2. In a large bowl, whisk together flour, baking powder, baking soda, and salt; set aside.
  3. In another bowl, beat together banana, brown sugar, egg, coconut oil, vanilla, yogurt, and soy milk until smooth and creamy. Slowly add dry mixture to wet ingredients, and mix until combined. Gently fold coconut and chia seeds into the batter.
  4. Pour batter in prepared loaf pan in layers with berries in between (to avoid the frozen berry colors from running which happens to me when I fold the berries into the batter). Sprinkle top with coconut. 
  5. Bake for 55-65 minutes or until toothpick inserted into center comes out clean. Cool on wire rack for 20 minutes, then remove from pan and return to wire rack to finish cooling. Bread is even better the next day (they always are). Bread will stay fresh for a few days when wrapped tightly. 

Oh my! Look at that golden, toasty coconut! Please do yourself a favor and bake this now! If you're still in a breakfast rut make some blueberry muffins!

xoxo, allison

Wednesday, April 2, 2014

BAKE | SKILLET HONEY CORNBREAD

Whenever my sister comes home from college, my dad barbecues baby back ribs, we invite her boyfriend over, and we feast! It's usually up to the rest of us to come up with side dishes, and we love our carbs. Traci happened to be over that day and we decided to make mac & cheese and cornbread - two necessities of eating BBQ. I handled the mac & cheese and she was in charge of the cornbread.

Our siblings are always hesitant about letting us cook or bake together because we've have a long list of kitchen disasters and sub-par baked goods. But let me tell you, I think I figured out a solution. We can be in the kitchen at the same time, but we can't be baking together. Something about our excitement and teamwork and too much positive energy and maybe forgetting who measured what into the dry ingredients leads to failure.

So Traci worked on the cornbread and it turned out fantastic. I loved the crispy edges from the cast iron pan. When it come out of the oven I poked holes using a toothpick and drizzled honey all over the top. Best. idea. ever.

Skillet Cornbread
Recipe Adapted from The Pioneer Woman
Servings: 12

INGREDIENTS
  • 1 cup Yellow Cornmeal
  • 1/2 cup All-purpose Flour
  • 1 tsp Salt
  • 1 TBS Baking Powder
  • 1 cup Buttermilk (or 1 cup milk + 1 tsp vinegar)
  • 1/2 cup Milk
  • 1 Egg
  • 1/2 tsp Baking Soda
  • 1/4 cup (+2 TBS for skillet) butter (or shortening)
  • 1/8-1/4 cup honey
  1. Preheat oven to 450 degrees.
  2. In a medium bowl, combine cornmeal, flour, salt, and baking powder. 
  3. Stir together buttermilk, milk, and egg. Add the baking soda and stir.
  4. Pour the wet into the dry ingredients. Stir with a fork until combined.
  5. In a small bowl, melt 1/4 cup butter and slowly add to the batter, stirring until just combined. In an iron skillet, melt the 2 tablespoons butter over medium heat. Pour the batter into the hot skillet. Spread to even out the surface. (Batter should sizzle.)
  6. Cook on stovetop for 1 minute, then bake for 20 -25 minutes or until golden brown. Edges should be crispy! Remove from oven and immediately drizzle the top of the cornbread with honey. 

Here's another look at the four racks of baby back ribs my dad barbecued! It's perfect BBQ weather right now!

xoxo, allison