Showing posts with label cookies. Show all posts

Tuesday, April 15, 2014

BAKE | PEANUT BUTTER BLOSSOMS

As I mentioned yesterday, Allison and I helped David bake cookies for his Church bake sale. These are the peanut butter cookies we made topped with a Hershey Kiss! This one was my favorite, but I love peanut butter so I'm probably biased. 
All ready for the bake sale!

Peanut Butter Blossoms
Adapted from the Hershey's website
Makes 24 cookies

24 Hershey's Kisses Brand Milk Chocolate
1/2 cup shortening
3/4 cup peanut butter
1/3 cup granulated sugar
1 egg
2 tablespoons milk
1 teaspoon vanilla extract
1 1/2 cups all-purpose flour
1 teaspoon baking soda
1/2 teaspoon salt
Additional granulated sugar

  1. Heat oven to 375°F. Remove wrappers from chocolates. 
  2. Beat shortening and peanut butter in large bowl until well blended. Add 13/ cup granulated sugar and brown sugar; beat until fluffy. Add egg, milk and vanilla; beat well. Stir together flour, baking soda and salt; gradually beat into peanut butter mixture. 
  3. Shape dough into 1-inch balls (We made ours a little bigger). Roll in granulated sugar; place on ungreased cookie sheet. 
  4. Bake 8 to 10 minutes or until lightly browned. immediately press a chocolate into center of each cookie; cookie will crack around edges. Remove from cookie sheet to wire rack. Cool completely. 
xoxo, traci

Friday, April 11, 2014

BAKE | EASY KISSES CHOCOLATE CHIP COOKIES


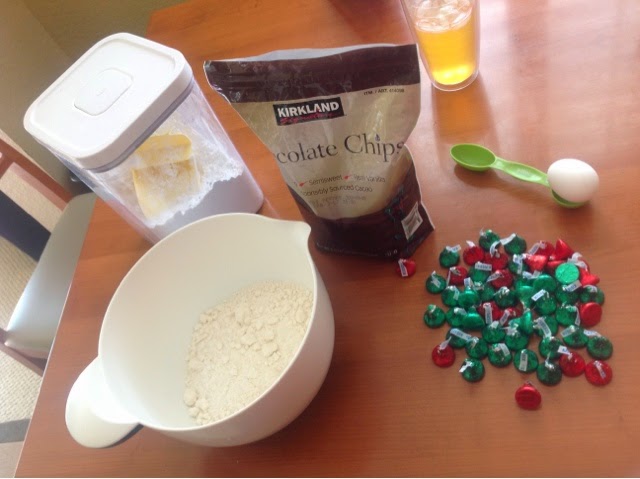
So I got a text from David the other day saying that he was having a bake sale at church and needed help baking cookies. Since I had a lot of extra Hershey Kisses that I got from the after Christmas sale (don't worry- they're not expired yet!), I told David to go look for a recipe online with Hershey Kisses. He found two recipes that looked really easy to make, so we decided to make both! Alley came over too and we were able to make them really quickly. We made the chocolate chip cookies first (the ones that look like little round balls at the top of the picture)... I'll post the peanut butter (the ones with the gigantic kiss in the middle) recipe tomorrow :) I was super excited to make these cookies because although they look like regular chocolate chip cookies, they actually have a Hershey Kiss inside!!! Don't you just love surprises?!


nap time for me while David did the mixing :)


KISSES Chocolate Chip Cookies
Adapted from the Hershey's website
Makes 24 cookies

  • 24 Hershey's Kisses Brand Milk Chocolates
  • 1 pouch Betty Crocker Sugar Cookie Mix
  • 2 tablespoons all-purpose flour
  • 1/3 cup butter or margarine, softened
  • 1 egg
  • 1-1/4 cups chocolate chips
  • 1 teaspoon shortening


  1. Heat oven to 350°F. Remove wrappers from chocolates. 
  2. Stir together cookie mix and flour; add butter and egg. Stir until dough forms. Set aside 1/4 cup chocolate chips. Stir remaining chips into dough. 
  3. Mold dough around each chocolate piece, covering completely. (The original recipe recommended using 1 tablespoon of dough, but I used around 2. My cookies turned out bigger so I was only able to make 24 instead of the the 52 that the original recipe said it would make) Shape into balls; place on ungreased cookie sheet
  4. Bake 9-11 minutes or until cookie is set. Cool slightly; remove from cookie sheet to wire rack. Cool completely.
  5. Optional chocolate drizzle- we decided that the cookie already had enough chocolate, so we decided not to do it. If you're a huge chocolate fan though, I'd recommend it :)
    • Place remaining 1/4 cup chips and shortening in heavy-duty resealable plastic food storage bag. microwave at medium for 30 seconds; stir. If necessary, microwave at medium an additional 10 seconds at a time, kneading after each heating, until chocolate is melted and mixture is smooth. Cut off corner of bag about 1/8 inch from point. Drizzle over cookies. 

xoxo, traci 

Saturday, March 8, 2014

BAKE | THUMBPRINT JAM COOKIES

Short story: the other day I had a craving for thumbprint cookies. I found a jar of strawberry jam. I made the cookies.
These cookies are so easy to make, all you basically need is flour, sugar, butter, and your favorite jam. I started out with cookie-scoop sized dough balls and then decided to break the second batch in half to make mini cookies. My sister went a little over board with the jam but I like a good cookie to jam ratio and these were great. The jam centers are a little messy looking because we didn't make the wells deep enough.
Scoop them out and roll them!
Recipe Adapted from Food Network
Ingredients

  • 8 oz (2 sticks) unsalted butter, softened at room temperature
  • 2/3 cup sugar
  • 1 tsp vanilla extract 
  • 1/8 tsp salt
  • 2 cups plus 2 TBS flour
  • 1/2 - 1 cup strawberry jam
  1. Preheat the oven to 350 degrees. Butter a baking sheet.
  2. In a mixer fitted with a paddle attachment (or hand mixer), cream the butter and sugar together until fluffy. 
  3. Add vanilla extract and salt; mix until incorporated. 
  4. Add the flour and mix at low speed until incorporated. 
  5. Scoop dough using a cookie scooper and then roll the dough into golf-ball-sized balls and arrange them 2 inches apart on the cookie sheet
  6. Use your thumb to make a shallow hole in each dough ball. Roll your thumb back and forth to widen the well. Then, fill the holes with jam. (My little sister went a little overboard with the jam) 
  7. Bake until lightly browned around the edges, 10-15 minutes. Let cool on the pan. Store in an airtight container.
Here are the mini ones. 

If you haven't had thumbprint cookies before, you should definitely try baking these! I like to consider these practically healthy because they have fruit! Next time, I'm going to try some blackberry jam or orange marmalade. You can also freeze them after you bake them if you'd like. Not that many will last that long.

xoxo, allison

Wednesday, December 25, 2013

BAKE | NO-CHILL SUGAR COOKIES

The last 25 minutes of Jesus' birthday and I almost forgot to finish this post! So, Merry Christmas!
My family woke up early this morning to cook breakfast at my grandparents' house. That meant fluffy blueberry belgium waffles, bacon, sausage, over-easy eggs, tater tots, and hash browns. (We love our crispy potatoes!) My little sister kept asking when we were returning home to open presents. I told her all her secret Santa got her this years were hugs. She wasn't amused.
These cookies we made to give out tonight to our aunts and uncles. Last year I swore I would NEVER make sugar cookies again after all the time spend chilling, rolling, and cookie cutting sticky dough. By the time I was done cutting out all the cookies I gave up on the idea of piping icing and settled on sprinkles.
When I saw the title of this recipe I forgot all about last year's sugar cookie making disaster. And I wasn't disappointed.
Cold cubes of butter.
 Add in the sugar.
 Measure out your dry ingredients...
 Sugar and butter gets creamed. Then add in the vanilla and egg!
 No need to wait for the dough to chill! Sprinkle some flour on your rolling surface. Wrap your rolling pin in plastic wrap for easy clean-up. Rough out that dough and punch out the cookies.
 We started out with the big cookie cutters...
 Then we realized that the little cookie cutters are so much cuter! 
Put your cut out cookie in the freezer for 10 minutes.
 Fresh baked cookies. Aren' they cute?
Ingredients:
COOKIE DOUGH adapted from Bake at 350
  • 3 cups unbleached, all-purpose flour
  • 2 tsp baking powder
  • 1 cup sugar 
  • 1 cup (2 sticks) butter, cold & cut into chunks
  • 1 egg
  • 1 tsp pure vanilla extract
  • 1/4 tsp salt
  1. Preheat oven to 350
  2. Combine the flour and baking powder, set aside. 
  3. Cream the sugar and butter. Add the egg and extracts and mix. 
  4. Gradually add the flour mixture and beat just until combined, scraping down the bowl, especially the bottom. The dough will be crumbly, so knead it together with your hands as you scoop it out of the bowl for rolling.
  5. Roll on a floured surface to about 1/2" thick, and cut into shapes. 
  6. Place on parchment lined baking sheets
  7. Freeze the cut out shapes on the baking sheet for 10 minutes before baking. This ensures the your shapes keep during the baking and prevents the smaller more complicated cut outs from baking into a glob.
  8. Bake for 10-12 minutes. Let sit a few minutes on the sheet, then transfer to a cooling rack. 
  9. Frost and add sprinkles. 

I used pink and light green frosting and red and green sugar crystals. Don't my reindeer kind of look like unicorns or My Little Pony. haha oh well. They are as good as they look and don't crumble easily if you'd like to stack them in boxes to give away. I can't wait to make sugar cookies for every special occasion since this method is so darn easy and I don't have to wait 2 hours to chill the dough before I can get to baking! Easy peasy! Hope your Christmas was as special as mine.

xoxo, allison

Friday, November 8, 2013

BAKE | GIANT REESE'S PIECES COOKIES


I've had this bag of Reese's pieces for a while now. And I finally found a home for them in these giant Reese's pieces cookies! We mixed these up on Wednesday along with these giant pumpkin chocolate chip cookies, and I put them in the fridge until I baked them all on Saturday. These were a big hit at our church bake sale since we were the only ones who baked anything peanut buttery. Also, Reese's pieces are naturally fall colors. What could be more perfect? 
xoxo, allison & traci


Adapted from Sally's Baking Addiction

Ingredients
  • 4 1/2 cup all-purpose flour
  • 2 tsp baking soda
  • 3 tsp cornstarch
  • 1 tsp salt
  • 1 1/2 cup (3 sticks) unsalted butter, melted
  • 1 1/2 cup light brown sugar, loosely packed
  • 1 cup granulated sugar
  • 2 large egg + 2 egg yolk
  • 4 teaspoons vanilla extract
  • 1 (15 oz) bag of Reese's Pieces
  1. In a large bowl, mix flour, baking soda, cornstarch and salt. 
  2. In a medium bowl, whisk the melted butter, brown sugar, and granulated sugar together. Whisk in the eggs, then the egg yolks. Mix in the vanilla. 
  3. Pour the wet ingredients into the dry ingredients and mix together. Fold in Reese's Pieces. Cover the dough and chill for 2 hours, or up to 3 days. Chilling is mandatory.
  4. Take the dough out of the refrigerator and allow to slightly soften at room temperature for 10 minutes.
  5. Preheat the oven to 325F degrees. Line two large baking sheets with parchment paper or silicone baking mats. 
  6. Using a cookie scoop, roll 2 and 1/2 scoops into balls. Put 6 balls of dough onto each cookie sheet and smoosh down slightly with your palm. To make them look extra pretty, press a few more Reese's pieces on top of the dough balls. Bake the cookies for 12-13 minutes until edges are brown. (The cookies will look very soft and underbaked, but they will continue to bake on the cookie sheet.) Allow to cool on the cookie sheet for 10 minutes before moving to a wire rack to cool completely.
  7. Cookies stay soft and fresh for 7 whole days at room temperature. Rolled cookie dough may be frozen up to three months.

Tuesday, November 5, 2013

BAKE | GIANT CHEWY PUMPKIN CHOCOLATE CHIP COOKIES


I know, I know, I'm a little late to the pumpkin party. But better late then never right? I thought I'd try a new recipe this year because my favorite recipe is soft and cakey and when you stack them up they tend to all stick together. This recipe is chewy and perfect for stacking together, bagging them up, and selling them at a church bake sale - which is exactly what we did this past Sunday. Traci and I mixed up the dough on Wednesday and I put them in the fridge until I baked them all on Saturday. Next time, I'll probably add a little more pumpkin spice, but other than that, they were just what I wanted. They were a huge hit at church - one of the first items to sell out! If you haven't made your way to the pumpkin party yet, it's not too late to join!
XO Allison & Traci.


Recipe Adapted from Sally's Baking Addiction
Makes 24 giant cookies (4-5 inches in diameter)

INGREDIENTS:
  • 1 1/2 cup (3 sticks) unsalted butter
  • 3/4 cup light brown sugar
  • 1 1/2 cup granulated sugar
  • 3 tsp vanilla extract
  • 1 cup pumpkin puree 
  • 4 and 1/2 cups all-purpose flour
  • 3/4 tsp salt
  • 3/4 tsp baking powder
  • 3/4 tsp baking soda
  • 5 tsp ground cinnamon
  • 3/4 tsp ground nutmeg
  • 1/4 tsp ground cloves
  • 1 tsp pumpkin spice 
  • 1 1/2 cup semi-sweet chocolate chips

  1. In a medium bowl, whisk the melted butter, brown sugar, and granulated sugar together. Whisk in the vanilla and pumpkin until smooth. Set aside.
  2. In a large bowl, toss together the flour, salt, baking powder, baking soda, cinnamon, nutmeg, cloves, and pumpkin spice. Pour the wet ingredients into the dry ingredients and mix together. Fold in chocolate chips. Cover the dough and chill for 30 minutes, or up to 3 days. Chilling is mandatory.
  3. Take the dough out of the refrigerator. Preheat the oven to 350F degrees.
  4. Use cookie scooper to make heaping scoops of dough. Combine 2 scoops and roll the dough into ball. Flatten the dough balls to 1/2 inch thickness (as pictured above) because the cookies only spread a little in the oven. Bake the cookies for 12-13 minutes. Remove from the oven and press a few more chocolate chips onto the tops, to make the pretty.  
  5. Allow the cookies to cool for at least 10 minutes on the cookie sheets before transferring to a wire rack.  Cookies stay soft, moist, and chewy stored at room temperature for up to 1 week.